Zhi Shen Yong
My name is Zhi Shen Yong and I am a software developer. Here you can find a few of the projects I have worked on in the past. Please feel free to contact me for any additional information.
8 September 2019
Building a Dynamic Website with Node.js and MySQL
In this project, we will be connecting a MySQL database to the Node.js website we built in this last project
Asynchronous dynamic websites have the ability to perform content updates without requiring the page to be refreshed. The advantage server-side dynamic websites have over client-side dynamic websites is that client-side dynamic websites lose their update history whenever the website is refreshed. Even so, server-side dynamic websites that are not connected to a database of some kind suffer the same loss of update history as client-side dynamic websites do when the servers are restarted.
Connecting our website to a database management system like MySQL will allow us to store data in a persistent manner; even if the servers hosting our website are restarted, the content that we have changed in our last server session will persist to our next session.
First, we need to download and install both MySQL Server and MySQL Workbench. You will be able to start, stop, and configure your MySQL installation through System Preferences.
When you open up MySQL Workbench for the first time, you will be prompted to create a new root account with a username and password. You can create the account however you like, but keep track of the username and password that you use.
After you’ve created your root account, press the button with the little cylinder and the plus icon to create a new Schema. Set the name of your Schema to be main, and select the utf8 option for Character Set and utf8-bin for Collation.
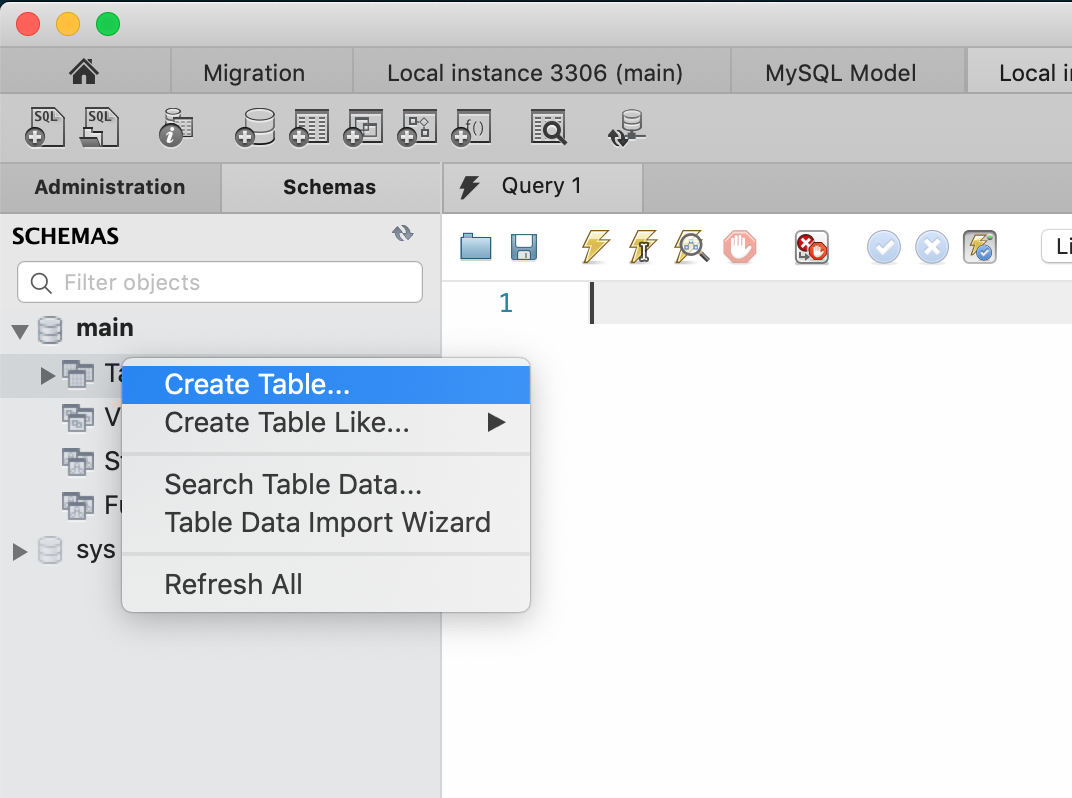
Double-click on your Schema in the left-hand pane to select it. To create a table in your Schema, right-click on the Tables tab in the left-hand pane and click Create Table.
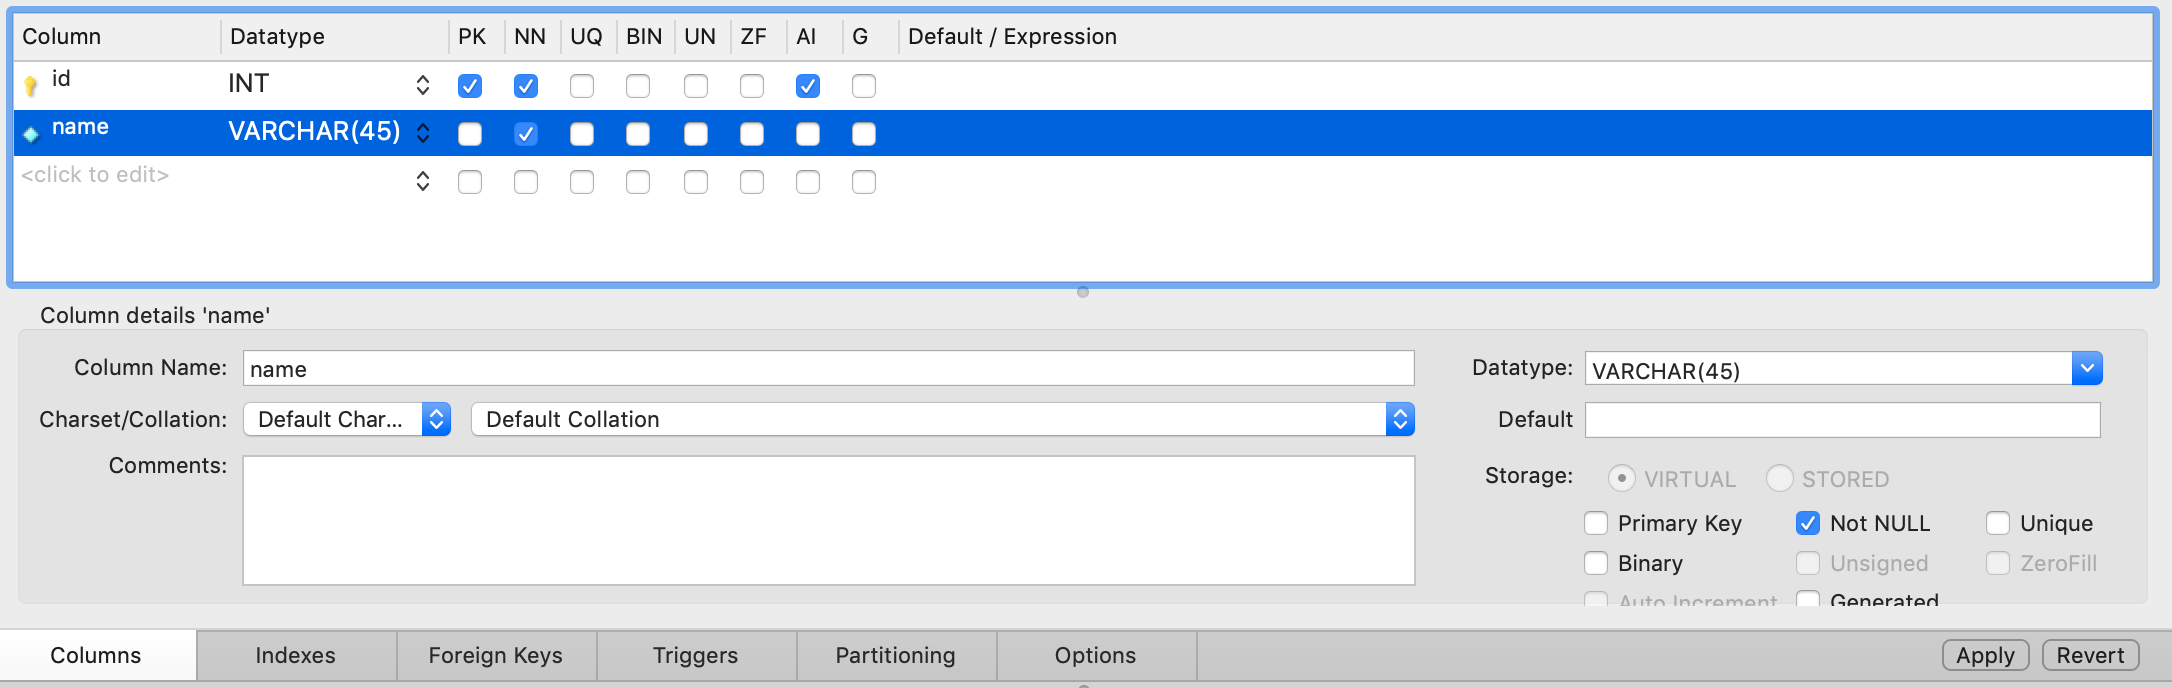
Name the table groceryItem, and add two columns to the table. Name the first column id. Make sure to check the PK, NN, and AI boxes for this particular column. The purpose of this column is to uniquely identify every grocery item that is added to this table. Hence, we check PK for Primary Key and AI for Auto-Increment.
Name the second column name. This column will store the name of each item we add to our grocery list. Check the NN box, which requires that this column can never be null.
In this project we are just going to be connecting MySQL to our website — we aren’t going to be adding any other complex functionality to our existing grocery list –– so we aren’t going to be adding any other columns. If you were going to expand on this project and add fields such as quantity or price to the grocery list, then you would add those fields as columns in this table.
Click on the Apply button on the right-hand side of the screen to create our table. Now we have a table we can store data in!
To connect to it from our Node.js website, we first need to install the MySQL module in our Node.js service. Do this by running npm install mysql from your project folder. If the module has been installed correctly, you should be able to see it in the package.json file, under the dependencies field.
To import the module into our service, add the following code below the code we used to import the body-parser module:
var mysql = require('mysql');
const db = mysql.createConnection({
	host: 'localhost',
	user: 'root',
	password: 'password',
	database: 'main'
});
You will need to replace root and password with the username and password that you used to create your MySQL root account. This code also establishes a connection between your Node.js server and the MySQL database running on your local computer.
Now let’s query the database. Edit your /getList routing function to look like this:
app.get('/getList', (req, res) => {
	db.query('SELECT * FROM `groceryItem`', (err, result, fields) => {
		console.log(result);
	});
    res.send({'response': serverList});
});
Now, whenever /getList is called, we query the database before sending a response back to the client. In our query, we simply ask for every item in the groceryItem table, and we log this to the server console.
Since we haven’t added anything to the table yet, we should get an empty array. If you start up the server and access localhost:8080, you should see that this is the case.
Let’s add a query that will allow us to add items to the database. Edit your /addItem routing function to look like this:
app.post('/addItem', (req, res) => {
	db.query('INSERT INTO `groceryItem` (`name`) VALUES ("' + req.body.itemName + '")', (err, result, fields) => {
		console.log('added ' + req.body.itemName);
	});
    res.send({'response': 'success'});
});
Here, instead of pushing req.body.itemName into the serverList array, we instead insert it into the groceryItem table in our database. If you restart the server, open up localhost:8080, and try adding an item to the grocery list, you should see a non-empty array logged to the server console. This is the /getList routing function being called by the client-side fetchList() which is called when the /addItem routing function has sent back a success response to the add-item Ajax function which is called when the Add Item button is clicked. If you added an Apple you should see something like this logged to the console:
[ RowDataPacket { id: 1, name: 'Apple' } ]
Now let’s edit our /getList function again so that instead of sending the client the serverList array, we send back the array that we queried from the database.
app.get('/getList', (req, res) => {
	db.query('SELECT * FROM `groceryItem`', (err, result, fields) => {
		var sendToClient = [];
		for (var i = 0; i < result.length; i++) {
			sendToClient.push(result[i].name);
		}
		res.send({'response': sendToClient});
	});
});
In the code above, after we have queried the database and received the results array containing all the data from the groceryItem table, we need to collect only the names from the items — which we do in the for loop.
Now, whenever we access localhost:8080, we should see a list of items corresponding to the items stored in our MySQL database. Adding an item through the client will add that item into the database and trigger the server to pull from the database and update the client list. Our data should also now be persistent across both client and server sessions, meaning that we can both refresh the client and restart the server and our grocery list should remain the same!
In this project, we have connected our server-side dynamic website to a MySQL database. Now, armed with the knowledge we have learned from the last four tutorials (including this one), we can now comfortably create data-driven asynchronous websites in Node.js!
tags: node - jquery - ajax - mysql