Zhi Shen Yong
My name is Zhi Shen Yong and I am a software developer. Here you can find a few of the projects I have worked on in the past. Please feel free to contact me for any additional information.
25 July 2019
Building a Server-Side Dynamic Website With Node.js, jQuery, and Ajax
In this project, we will be adding asynchronous server-side dynamic functionality to the client-side dynamic Node.js website we built in this last project.
Client-side asynchronous dynamic websites have the ability to perform content updates without requiring the page to be refreshed. The issue is that these updates are not stored across client sessions. This means that whenever we refresh the page, all of our content updates are lost. To combat this issue, we can implement server-side dynamic functionality, which is where all the data the user manipulates is stored on the server rather than on the client-side web browser.
Since the typical user will interact with data on the client side, we need to allow the client and the server to communicate in order to change and retrieve data that is stored on the server. To do this, we can use Ajax.
Ajax is a set of web development techniques using many web technologies on the client side to create asynchronous web applications. With Ajax, web applications can send and retrieve data from a server asynchronously without interfering with the display and behavior of the existing page.
Fortunately, jQuery comes with a built-in ajax() function that allows us to easily set up Ajax requests. To demonstrate how this function works, let’s edit the code in our click event handler to use Ajax to send a request to our Node.js server; on the server side, upon receiving the request, let’s send a confirmation message back to the Ajax function.
First, let’s edit the code in our click event handler:
$(document).ready(() => {
    $('#new-item-button').click(() => {
        console.log('Button clicked! Running ajax...');
        $.ajax({
            url: '/testingAjax',
            type: 'POST',
            contentType: 'application/json',
            dataType: 'json',
            data: JSON.stringify({message: 'Hello from client!'}),
            success: (data) => {
                console.log(data);
            }
        });
    });
});
Let’s break down this code:
- As soon as the button is clicked, we log the message
Button clicked! Running ajax...to the console. - To use the built-in Ajax function, we call
$.ajax(), which takes in a number of parameters.- The
urlparameter specifies which address the Ajax function should make the request to. - The
typeparameter specifies which HTTP method the Ajax request should use. - The
contentTypeparameter specifies the type of data the Ajax function should send. - The
dataTypeparameter specifies the type of data the Ajax function is expecting back from the server. - The
dataparameter specifies the data the Ajax function should send to the server. - The
successparameter specifies a function to be called if the Ajax request succeeds. In our success callback function, we log the data that is sent back from the server.
- The
If we refresh our page and click the Add Item button, we will see two messages in our JavaScript console. First, we’ll see the Button clicked! Running ajax... message, indicating that our click event handler worked. We will also see a 404 POST error message, saying that the /testingAjax address was not found.
We get the error message because we haven’t defined the /testingAjax routing function in our server.js file yet. For now, let’s switch over from working on index.pug to working on server.js. Earlier on in this project series, we learned how to create a routing function:
app.get('/', (req, res) => {
    res.render('index.pug');
});
Remember that all this code does is call res.render('index.pug') when the client makes a GET request to the / address. Now, we want to write a routing function to accommodate a POST request to the /testingAjax address. Add this block of code below the app.get() function:
app.post('/testingAjax', (req, res) => {
	console.log(req);
});
Now, when the client makes a POST request to the server, it’ll get picked up by this routing function, which simply logs the request to the server console (terminal). Refresh the web page and try clicking on the Add Item button again. If we take a look at the terminal, we should see a huge JSON object being logged to the console. This is the result of calling console.log(req).
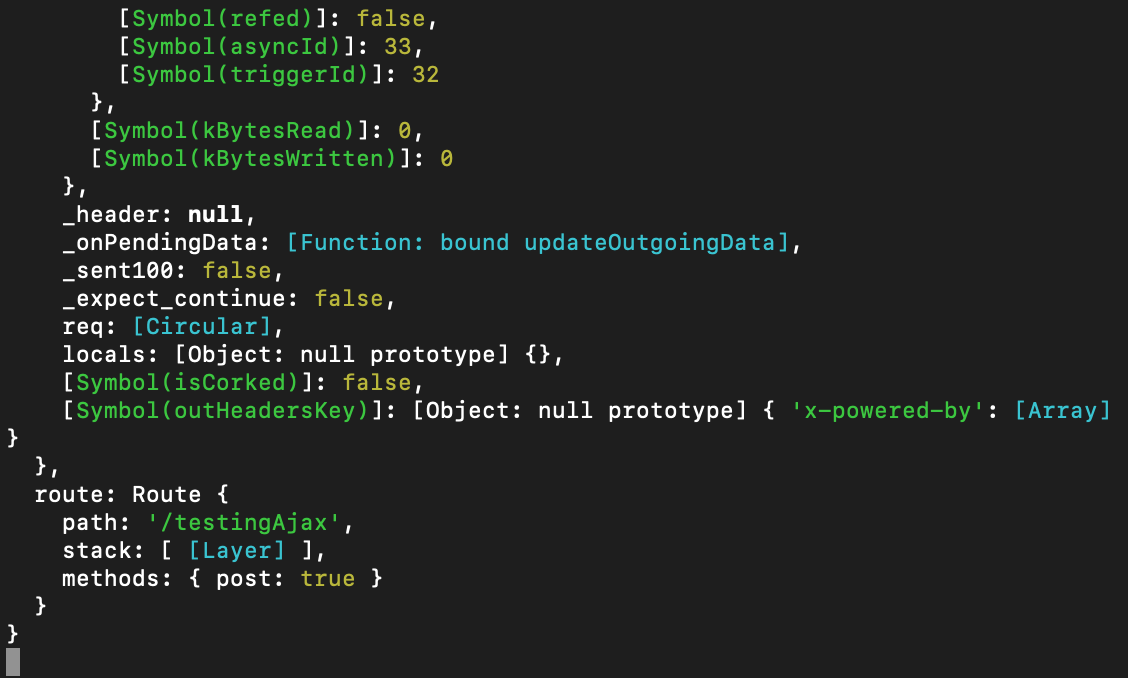
In reality, this is the request that is being made from the client to the server. Most of the time however, we aren’t concerned with all this extra information – we are only concerned with the data field that was sent as part of the Ajax request from the client. To filter out all the extra information, we can install a Node.js module called body-parser.
In your terminal, press control + c together to stop your Node.js server. Once it is stopped, run npm install body-parser to install body-parser into your Node.js application. Add the following block of code below app.set('view engine', 'pug') in your server.js file to import and use body-parser in your Node.js server.
const bodyParser = require('body-parser');
app.use(bodyParser.json());
In your terminal, run npm start to start up your server again. Now, edit the app.post() function to log req.body instead of req.
app.post('/testingAjax', (req, res) => {
	console.log(req.body);
});
Now, if you refresh the web page and click the Add Item button, you should again see the Button clicked! Runninng ajax... message in your client-side JavaScript console, but you should also now see { message: 'Hello from client!' } in your terminal (which is your server-side console).
If you are able to see the message in your terminal, that means you have successfully sent an Ajax request from the client to the server and have parsed the message using body-parser. The last thing to do here is to send a response back to the client letting them know that we have received their message. In the future, this is also where we will send server-side data for the client to update its DOM with. To send a response back to the client, edit the app.post() function to look like this:
app.post('/testingAjax', (req, res) => {
	console.log(req.body);
	res.send({'response': 'Hello from server!'});
});
Now, if you refresh the web page and click the Add Item button, you should see both the Button clicked! Running ajax... message in your client-side JavaScript console and { message: 'Hello from client!' } in your terminal. Additionally, you should now see an additional {response: "Hello from server!"} in your client-side JavaScript console – this is the response sent from the server!
Now we know how to use the $.ajax() function in jQuery to send requests from the client to the server and how to construct routing functions to accommodate those requests. Let’s apply this knowledge to our grocery list website. Instead of keeping the list of items on the client, we will store them on the server. Additionally, any items we add to the list will trigger an Ajax function that will update the list of items stored on the server, retrieve that very list, and then update the client-side grocery list element to display the new and updated list.
To begin, let’s switch back to index.pug and let’s remove the all the li tags from the ul element so that upon page refresh, our grocery list is empty.
ul(class='list-group list-group-flush' id='main-list')
	//- Nothing here!
Next, we will add an Ajax function with the sole purpose of fetching and displaying in our ul element a list of grocery items that is stored on the server. In your index.pug file, add a new function called fetchList() and call that function at the top of your $(document).ready() function.
$(document).ready(() => {

    fetchList();

    $('#new-item-button').click(() => {
        ...
    });
});

function fetchList() {
    $.ajax({
        url: '/getList',
        type: 'GET',
        dataType: 'json',
        success: (data) => {
            $('#main-list').html('');
            for (var i = 0; i < data.response.length; i++) {
                $('#main-list').append('<li class="list-group-item">' + data.response[i] + '</li>');
            }
        }
    });
}
All that the Ajax function inside fetchList() is doing is making a GET request to the /getList address. Assuming that the /getList address returns a list of grocery items, the success callback function of the fetchList() Ajax function iterates through the returned list and appends each item to the ul element as a li element.
Before iterating through the list of items, we need set the inner HTML of
#main-listto''. This is because theforloop iterates through the entire list of items each time the Ajax function runs, and appends each item in the list to#main-list; if we didn’t reset the contents of#main-listeach time, we would be tacking on duplicate lists to older lists instead of simply displaying the most updated list.
Now, in server.js, we need to create a global list of grocery items and also construct a routing function to accommodate the /getList Ajax request.
let serverList = ['Apples', 'Bread', 'Spaghetti'];

app.get('/getList', (req, res) => {
    res.send({'response': serverList});
});
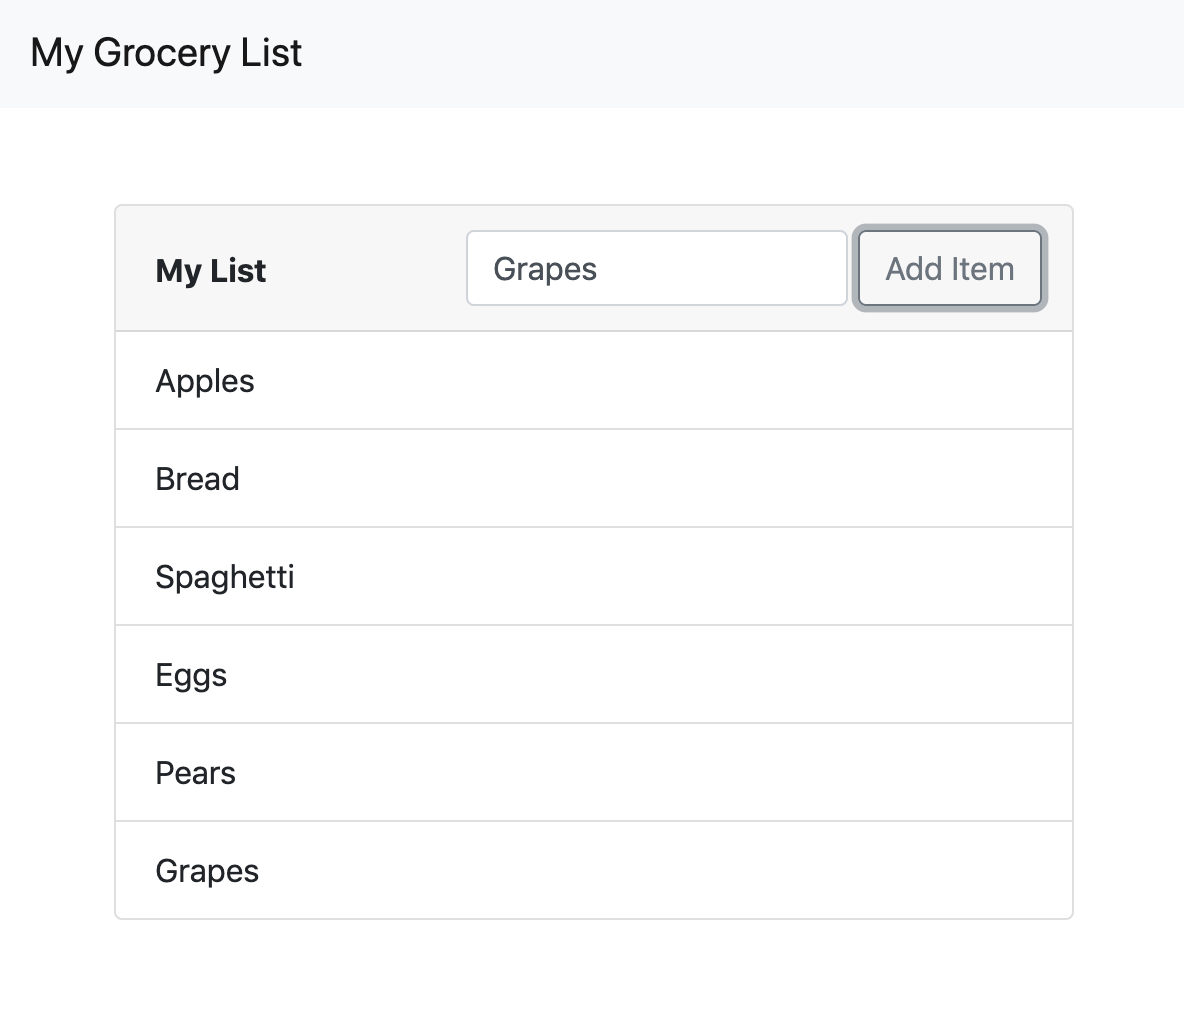
All that the /getList routing function is doing is sending back the list of items stored on the server. If you refresh the web page, our ul element should now be populated with three items – Apples, Bread, and Spaghetti.
Now, let’s add some functionality to our text field and button so that when we type something in the text field and press the button, the grocery list will be updated to show the whatever we typed in the text field. To do this, we need to first edit our click event handler so that it will send an Ajax request to the server with whatever item we have typed out in the text field. On the server side, let’s create a routing function that will push the received item into the global list. Upon receiving a confirmation from the server, let’s make our success callback function call the fetchList() function we created earlier so that the ul element is updated to show the now-longer grocery list.
First, let’s edit our click event handler in index.pug.
$(document).ready(() => {

    fetchList();

    $('#new-item-button').click(() => {
        var itemName = $('#new-item-field').val();
        $.ajax({
            url: '/addItem',
            type: 'POST',
            contentType: 'application/json',
            dataType: 'json',
            data: JSON.stringify({itemName: itemName}),
            success: (data) => {
                fetchList();
            }
        });
    });
});
The first thing we do in our click event handler is to store whatever is written in the text field in the itemName variable. Then, we create an Ajax request to the /addItem address and send the itemName variable along with our request. In our success callback function, we simply call fetchList(), which will call its own Ajax function and update the client-side ul element with the new grocery list.
Now in server.js, we need to create a routing function to accommodate the /addItem Ajax request.
app.post('/addItem', (req, res) => {
	serverList.push(req.body.itemName);
	res.send({'response': 'good'});
});
All that this routing function is doing is pushing the new item into the global list of items and then sending a generic response (which we won’t use) back to the client.
After refreshing the web page, you should see a populated ul element, which is due to us calling fetchList() on document load. You should also now be able to enter item names into the text field, press the Add Item button, and see them show up on the grocery list asynchronously. You should be able to type and enter multiple items one after another and see them show up sequentially on the list. Also, you should be able to refresh the page, and all the items from your last grocery list should carry over to your current session – this is what it means for our website to have server-side dynamic functionality.
In this project, we have added server-side dynamic functionality to our grocery list website. This means that our grocery list is now stored on the server rather than on the client. Using Ajax, we are able to fetch the list from the server, as well as allow the user to add items to the server list and have their client DOM update asynchronously.
Server-side dynamic functionality is more useful than client-side dynamic functionality since updated information persists across client sessions. However, this information does not persist across server sessions, meaning that if we stop and restart the Node.js server, the grocery list will be reset to just three items – Apples, Bread, and Spaghetti. To retain information across server sessions we will need to connect the Node.js server to a database of some kind. To learn how to do this, check out my post on how to connect a Node.js website to a MySQL database here.
tags: node - jquery - ajax